
In this tutorial, we'll learn how to install Jupyter Notebook on Ubuntu 24.04 server with Nginx and secure with SSL certificate.
We will guide you through setting up a Jupyter Notebook Server on a VPS or dedicated server. Jupyter Notebooks are widely used in data science and machine learning for interactive coding, visualization, and experimentation. Running Jupyter Notebook on a remote server allows you to manage machine learning projects securely, share notebooks, and leverage the computing power of the server.
Prerequisites
- A KVM VPS or dedicated server with Ubuntu 24.04.
- Root or sudo access to the server (Root user is not recommended to use).
- Python 3.7+ installed on the server.
- Basic understanding of SSH and server management.
- A domain name with pointing A record to the server IP.
Install Jupyter Notebook on Ubuntu 24.04
Step 1: Update the Server
First, update the server to ensure all packages are up-to-date.
sudo apt update && sudo apt upgrade -y
This command will update the package list and upgrade the existing software to the latest versions.
Step 2: Install Python and Required Libraries
If Python 3 is not already installed, install it along with pip (Python package installer) and a few essential development tools:
sudo apt install python3 python3-pip python3-dev build-essential -y
After this, you can verify the installation of Python and pip by running:
python3 --version
pip3 --version
Step 3: Set Up a Virtual Environment
To keep your environment clean and avoid conflicts with other projects, it's recommended to set up a Python virtual environment.
Install the venv module:
sudo apt install python3-venv -y
Create a virtual environment in your desired directory:
python3 -m venv jupyter_env
Activate the virtual environment:
source jupyter_env/bin/activate
When the virtual environment is active, your shell prompt will show the environment's name, indicating you are in the isolated environment.
Step 4: Install Jupyter Notebook
Once the virtual environment is set up, you can install Jupyter Notebook using pip:
pip install jupyter
This will install Jupyter and its dependencies. Once installed, verify it with:
jupyter --version
Step 5: Configure Jupyter Notebook for Remote Access
By default, Jupyter only allows access from localhost. To access it remotely, you need to configure it to listen to external connections.
Generate a Jupyter configuration file:
jupyter notebook --generate-config
This will create a configuration file at ~/.jupyter/jupyter_notebook_config.py.
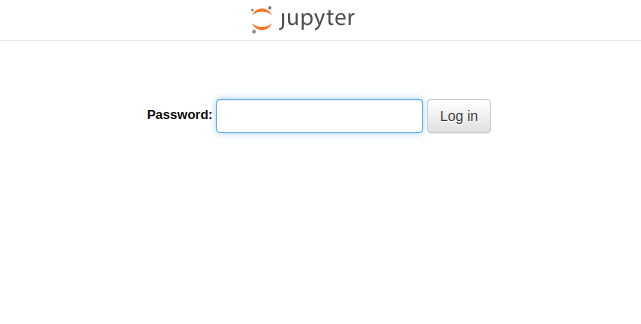
Set a password for Jupyter Notebook to protect it from unauthorized access:
jupyter notebook password
You will be prompted to enter and verify a password. The hashed password will be stored in a jupyter_notebook_config.json file for security.
Edit the configuration file to allow remote access:
Open the configuration file:
nano ~/.jupyter/jupyter_notebook_config.py
Find and modify the following lines (uncomment them if they are commented):
# c.ServerApp.ip = 'localhost'
# c.ServerApp.port = 0
It should look like:
c.ServerApp.ip = '0.0.0.0'
c.ServerApp.port = 8888
This configuration allows Jupyter to listen on all available IP addresses (0.0.0.0) and disables automatic browser opening on the server itself.
Step 6: Configure firewall
If you have enabled UFW firewall, you need to add TCP ports
sudo ufw allow 8888/tcp
sudo ufw allow 80/tcp
sudo ufw allow 443/tcp
sudo ufw reload
Step 7: Run Jupyter Notebook
To run the Jupyter Notebook server, execute the following command in your virtual environment:
jupyter notebook
Nagivate to your browser and access the Jupyter notebook
http://server_ip:8888
Step 8: Access the Jupyter Notebook from Your Local Machine
To access Jupyter Notebook remotely, you need to tunnel your connection using SSH, or directly open the port on the firewall (not recommended due to security risks).
Access Jupyter via SSH Tunnel (Recommended)
On your local machine, run the following command:
ssh -L 8888:localhost:8888 username@your_server_ip
This command forwards port 8888 on your local machine to port 8888 on the remote server. After running the command, you can access Jupyter Notebook in your browser by going to:
http://localhost:8888
Step 9: Enable Jupyter as a Systemd Service
To ensure your Jupyter Notebook server automatically starts after a reboot, you can configure it as a systemd service.
Create a new service file:
sudo nano /etc/systemd/system/jupyter.service
Add the following configuration to the file:
[Unit]
Description=Jupyter Notebook

[Service]
Type=simple
PIDFile=/run/jupyter.pid
ExecStart=/home/username/jupyter_env/bin/jupyter-notebook --config=/home/username/.jupyter/jupyter_notebook_config.py
User=username
Group=username
WorkingDirectory=/home/username
Restart=always
RestartSec=10

[Install]
WantedBy=multi-user.target
Replace /home/username/ with your actual home directory path and username with your user account.
Reload systemd and enable the service:
sudo systemctl daemon-reload
sudo systemctl enable jupyter
sudo systemctl start jupyter
Now Jupyter will automatically start after a reboot and run in the background.
Check the status of jupyter service:
systemctl status jupyter
Here your will find token:
Oct 15 02:24:23 jupyter jupyter-notebook[5385]:         http://jupyter:8888/tree?token=16dc4db2331c725588a7930cf5f09d005f53a4d421061e9d
Oct 15 02:24:23 jupyter jupyter-notebook[5385]:         http://127.0.0.1:8888/tree?token=16dc4db2331c725588a7930cf5f09d005f53a4d421061e9d
You will need the token to login or change the login password.
Step 10: Install Nginx for Jupyter Notebook
To make your Jupyter Notebook server more secure and accessible over HTTPS, you can use Nginx as a reverse proxy and Certbot to obtain a free SSL certificate from Let's Encrypt. This setup ensures that your connection to the Jupyter Notebook server is encrypted, which is important when working with sensitive data.
Below are the steps to install Nginx, configure it as a reverse proxy for Jupyter, and secure the connection with an SSL certificate from Let's Encrypt using Certbot.
Install Nginx
First, install Nginx on your server:
sudo apt install nginx -y
Once Nginx is installed, start and enable it:
sudo systemctl start nginx
sudo systemctl enable nginx
Check if Nginx is running by opening your server's IP address in a browser. You should see the default Nginx page.
Configure Nginx as a Reverse Proxy for Jupyter
To allow Nginx to act as a reverse proxy for Jupyter Notebook, create a new Nginx configuration file for Jupyter.
Create a new configuration file:
sudo nano /etc/nginx/sites-available/jupyter
Add the following content to the file, replacing your_domain_or_IP with your actual domain or server IP:
server {
    listen 80;
    server_name your_domain_or_IP;

    location / {
        proxy_pass http://localhost:8888;
        proxy_set_header Host $host;
        proxy_set_header X-Real-IP $remote_addr;
        proxy_set_header X-Forwarded-For $proxy_add_x_forwarded_for;
        proxy_set_header X-Forwarded-Proto $scheme;

        # WebSocket support
        proxy_http_version 1.1;
        proxy_set_header Upgrade $http_upgrade;
        proxy_set_header Connection "upgrade";
    }
}
This configuration directs all traffic on port 80 (HTTP) to Jupyter Notebook running on port 8888.
Enable the configuration by creating a symbolic link:
sudo ln -s /etc/nginx/sites-available/jupyter /etc/nginx/sites-enabled/
Test the Nginx configuration for errors:
sudo nginx -t
Restart Nginx to apply the changes:
sudo systemctl restart nginx
At this point, Nginx will forward traffic from http://your_domain_or_IP to Jupyter Notebook on port 8888. However, the connection is still not secure. In the next steps, we will set up SSL with Certbot.
Install Certbot and Obtain an SSL Certificate
Let's Encrypt provides free SSL certificates, and Certbot automates the process of obtaining and renewing them.
Install Certbot and the Nginx plugin:
sudo apt install certbot python3-certbot-nginx -y
Obtain the SSL certificate for your domain using Certbot:
sudo certbot --nginx -d your_domain_or_IP
Certbot will prompt you to provide an email address for urgent renewal notifications and agree to the terms of service. After this, Certbot will automatically obtain and configure the SSL certificate for Nginx.
Verify the SSL installation:
You can now access your Jupyter Notebook securely using https://your_domain_or_IP. The browser will show the lock icon, indicating a secure connection.
Step 11: Optimizing Jupyter for Machine Learning Projects
For machine learning projects, you can enhance your Jupyter Notebook setup with the following optimizations:
a) Install Essential Libraries
For machine learning, you’ll need libraries like NumPy, Pandas, scikit-learn, Matplotlib, Seaborn, TensorFlow, and PyTorch:
pip install numpy pandas scikit-learn matplotlib seaborn tensorflow torch
b) Leverage GPUs for Machine Learning
If your server has a GPU, you can install GPU versions of TensorFlow and PyTorch to speed up model training:
TensorFlow:
pip install tensorflow-gpu
PyTorch:
You can find the appropriate installation command for your setup on the official PyTorch site.
c) Notebook Extensions
Install Jupyter Notebook extensions for enhanced functionality like table of contents, code folding, and more:
pip install jupyter_contrib_nbextensions
jupyter contrib nbextension install --user
jupyter nbextension enable codefolding/main
Conclusion
We've seen
how to install Jupyter Notebook on Ubuntu 24.04 server with Nginx and secure with SSL certificate. You have successfully installed and configured a Jupyter Notebook Server for remote machine learning projects. This setup allows you to run your machine learning experiments, manage code, and visualize results interactively on a powerful remote server. Be sure to secure your setup, especially when exposing Jupyter to the internet, and optimize the server for your project needs.
By running Jupyter remotely, you benefit from accessing your notebooks from anywhere while leveraging the server’s resources, making it an ideal solution for complex machine learning projects.
