In this tutorial, we'll explain how to install and configure RabbitMQ on AlmaLinux 9. Also enable RabbitMQ managmenet console.
RabbitMQ is an open-source message broker software that implements the Advanced Message Queuing Protocol (AMQP). This guide will take you through the steps of installing and configuring RabbitMQ on AlmaLinux 9.
Install and Configure RabbitMQ on AlmaLinux
Prerequisites
- A dedicated server or KVM VPS running AlmaLinux 9
- Root or sudo privileges
Step 1: Update System Packages
First, update the system packages to the latest versions:
sudo dnf update -y
Step 2: Install Erlang
RabbitMQ requires Erlang to be installed on the system. Add the Erlang repository and install Erlang:
Step 3: Add the RabbitMQ and Erlang Repository
The following example sets up a repository that will install RabbitMQ and its Erlang dependency from a Cloudsmith mirror. This is the official repository. Feel free to check and modify it.
nano /etc/yum.repos.d/rabbitmq.repo
Add following content:
##
## Zero dependency Erlang RPM
##

[modern-erlang]
name=modern-erlang-el9
# uses a Cloudsmith mirror @ yum.novemberain.com.
# Unlike Cloudsmith, it does not have any traffic quotas
baseurl=https://yum1.novemberain.com/erlang/el/9/$basearch
        https://yum2.novemberain.com/erlang/el/9/$basearch
        https://dl.cloudsmith.io/public/rabbitmq/rabbitmq-erlang/rpm/el/9/$basearch
repo_gpgcheck=1
enabled=1
gpgkey=https://github.com/rabbitmq/signing-keys/releases/download/3.0/cloudsmith.rabbitmq-erlang.E495BB49CC4BBE5B.key
gpgcheck=1
sslverify=1
sslcacert=/etc/pki/tls/certs/ca-bundle.crt
metadata_expire=300
pkg_gpgcheck=1
autorefresh=1
type=rpm-md

[modern-erlang-noarch]
name=modern-erlang-el9-noarch
# uses a Cloudsmith mirror @ yum.novemberain.com.
# Unlike Cloudsmith, it does not have any traffic quotas
baseurl=https://yum1.novemberain.com/erlang/el/9/noarch
        https://yum2.novemberain.com/erlang/el/9/noarch
        https://dl.cloudsmith.io/public/rabbitmq/rabbitmq-erlang/rpm/el/9/noarch
repo_gpgcheck=1
enabled=1
gpgkey=https://github.com/rabbitmq/signing-keys/releases/download/3.0/cloudsmith.rabbitmq-erlang.E495BB49CC4BBE5B.key
       https://github.com/rabbitmq/signing-keys/releases/download/3.0/rabbitmq-release-signing-key.asc
gpgcheck=1
sslverify=1
sslcacert=/etc/pki/tls/certs/ca-bundle.crt
metadata_expire=300
pkg_gpgcheck=1
autorefresh=1
type=rpm-md

[modern-erlang-source]
name=modern-erlang-el9-source
# uses a Cloudsmith mirror @ yum.novemberain.com.
# Unlike Cloudsmith, it does not have any traffic quotas
baseurl=https://yum1.novemberain.com/erlang/el/9/SRPMS
        https://yum2.novemberain.com/erlang/el/9/SRPMS
        https://dl.cloudsmith.io/public/rabbitmq/rabbitmq-erlang/rpm/el/9/SRPMS
repo_gpgcheck=1
enabled=1
gpgkey=https://github.com/rabbitmq/signing-keys/releases/download/3.0/cloudsmith.rabbitmq-erlang.E495BB49CC4BBE5B.key
       https://github.com/rabbitmq/signing-keys/releases/download/3.0/rabbitmq-release-signing-key.asc
gpgcheck=1
sslverify=1
sslcacert=/etc/pki/tls/certs/ca-bundle.crt
metadata_expire=300
pkg_gpgcheck=1
autorefresh=1


##
## RabbitMQ Server
##

[rabbitmq-el9]
name=rabbitmq-el9
baseurl=https://yum2.novemberain.com/rabbitmq/el/9/$basearch
        https://yum1.novemberain.com/rabbitmq/el/9/$basearch
        https://dl.cloudsmith.io/public/rabbitmq/rabbitmq-server/rpm/el/9/$basearch
repo_gpgcheck=1
enabled=1
# Cloudsmith's repository key and RabbitMQ package signing key
gpgkey=https://github.com/rabbitmq/signing-keys/releases/download/3.0/cloudsmith.rabbitmq-server.9F4587F226208342.key
       https://github.com/rabbitmq/signing-keys/releases/download/3.0/rabbitmq-release-signing-key.asc
gpgcheck=1
sslverify=1
sslcacert=/etc/pki/tls/certs/ca-bundle.crt
metadata_expire=300
pkg_gpgcheck=1
autorefresh=1
type=rpm-md

[rabbitmq-el9-noarch]
name=rabbitmq-el9-noarch
baseurl=https://yum2.novemberain.com/rabbitmq/el/9/noarch
        https://yum1.novemberain.com/rabbitmq/el/9/noarch
        https://dl.cloudsmith.io/public/rabbitmq/rabbitmq-server/rpm/el/9/noarch
repo_gpgcheck=1
enabled=1
# Cloudsmith's repository key and RabbitMQ package signing key
gpgkey=https://github.com/rabbitmq/signing-keys/releases/download/3.0/cloudsmith.rabbitmq-server.9F4587F226208342.key
       https://github.com/rabbitmq/signing-keys/releases/download/3.0/rabbitmq-release-signing-key.asc
gpgcheck=1
sslverify=1
sslcacert=/etc/pki/tls/certs/ca-bundle.crt
metadata_expire=300
pkg_gpgcheck=1
autorefresh=1
type=rpm-md

[rabbitmq-el9-source]
name=rabbitmq-el9-source
baseurl=https://yum2.novemberain.com/rabbitmq/el/9/SRPMS
        https://yum1.novemberain.com/rabbitmq/el/9/SRPMS
        https://dl.cloudsmith.io/public/rabbitmq/rabbitmq-server/rpm/el/9/SRPMS
repo_gpgcheck=1
enabled=1
gpgkey=https://github.com/rabbitmq/signing-keys/releases/download/3.0/cloudsmith.rabbitmq-server.9F4587F226208342.key
gpgcheck=0
sslverify=1
sslcacert=/etc/pki/tls/certs/ca-bundle.crt
metadata_expire=300
pkg_gpgcheck=1
autorefresh=1
type=rpm-md
Step 3: Install Dependency
Next install dependencies from the standard repositories:
dnf install socat logrotate -y
Step 4: Install RabbitMQ and Erlang
Execute following command to install RabbitMQ and zero dependency Erlang:
dnf install -y erlang rabbitmq-server
Start the RabbitMQ service and enable it to start at boot:
sudo systemctl start rabbitmq-server
sudo systemctl enable rabbitmq-server
Step 5: Enable the RabbitMQ Management Console
RabbitMQ comes with a management console that makes it easier to monitor and manage RabbitMQ. Enable the management console plugin:
sudo rabbitmq-plugins enable rabbitmq_management
Step 6: Configure Firewall
If you have a firewall enabled, you need to allow access to RabbitMQ ports. Open the necessary ports:
sudo firewall-cmd --permanent --add-port=5672/tcp
sudo firewall-cmd --permanent --add-port=15672/tcp
sudo firewall-cmd --reload
- 5672: AMQP port
- 15672: Management console port
Step 7: Create an Admin User
Create an admin user for RabbitMQ:
sudo rabbitmqctl add_user admin password
sudo rabbitmqctl set_user_tags admin administrator
sudo rabbitmqctl set_permissions -p / admin ".*" ".*" ".*"
Replace password with a strong password of your choice.
Step 8: Access the RabbitMQ Management Console
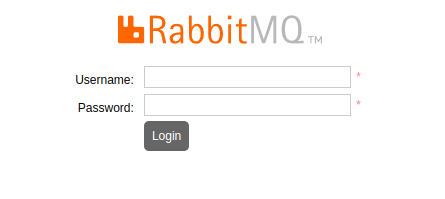
You can now access the RabbitMQ management console by navigating to http://<your_server_ip>:15672 in your web browser. Log in with the username admin and the password you set earlier.

Step 9: Verify the Installation
To verify that RabbitMQ is running correctly, you can use the following command:
sudo rabbitmqctl status
This command should return the status of RabbitMQ, confirming that it is running and operational.
Conclusion
You have successfully installed and configured RabbitMQ on AlmaLinux 9. You can now use RabbitMQ to handle your messaging needs. For more advanced configurations and usage, refer to the official RabbitMQ documentation.
Feel free to ask if you have any questions or need further assistance!

