
In this tutorial, we'll learn how to install HestiaCP on Ubuntu 24.04. A Free and Open-Source cPanel Alternative.
Installing HestiaCP on Ubuntu is a straightforward process that gives you a powerful, open-source alternative to cPanel. Below is a detailed, step-by-step guide for installing HestiaCP on Ubuntu 24.04. The explanations are written so that anyone in the IT industry—from early career to seasoned professional—can follow along easily.
Introduction to HestiaCP
HestiaCP is a web-based hosting control panel. It provides an intuitive graphical interface and a suite of management tools to simplify server and website administration. Here’s why you might consider using it:
Open Source and Free: There are no hidden fees, and you can view and modify the source code.
Lightweight and Fast: HestiaCP is built on top of the Nginx or Apache web server and doesn’t demand heavy resources.
Easy to Use: You can manage domains, emails, DNS records, databases, and security configurations without diving into the command line too deeply.
Prerequisites
Before proceeding, make sure you have the following in place:
- A Fresh Ubuntu 24.04 dedicated server or KVM VPS.
- Root or Sudo Privileges: You should have sudo privileges to install packages and make system-wide changes.
- A Valid Domain Name (Optional but Recommended)
How To Install HestiaCP on Ubuntu 24.04
Step 1: Update and Upgrade Your System
It is best practice to ensure your server is up to date before installing any new software.
Open your Terminal or SSH into your server and run the Update and Upgrade Commands:
sudo apt update
sudo apt upgrade -y
- sudo apt update fetches the latest list of available packages.
- sudo apt upgrade -y upgrades all currently installed packages to their newest versions. The -y flag automatically answers “yes” to any prompts.
Keeping your system packages updated helps avoid conflicts and ensures you have the latest security patches.
Step 2: Set Your Server’s Hostname (FQDN)
HestiaCP requires a fully qualified domain name (FQDN). Even if you don’t have a real domain, you can still set a placeholder. However, it’s better to use an actual domain if you plan on hosting websites.
Check Current Hostname:
hostname
Set/Change Hostname:
sudo hostnamectl set-hostname server.yourdomain.com
Replace server.yourdomain.com with the hostname or domain you intend to use.
Update Hosts File:
sudo nano /etc/hosts
Add a line such as:
127.0.0.1 server.yourdomain.com server
This ensures your system recognizes its own hostname locally.
Verify:
hostnamectl
You should see the updated hostname under “Static hostname”.
Step 3: Download the HestiaCP Installation Script
HestiaCP provides a convenient installation script that automates the process.
Download the Script:
wget https://raw.githubusercontent.com/hestiacp/hestiacp/release/install/hst-install.sh
This command fetches the installer script from HestiaCP’s official GitHub repository.
Make the Script Executable:
chmod +x hst-install.sh
This step ensures the script can be run as a program.
Step 4: Run the Installation Script
The HestiaCP script will guide you through a series of prompts where you can customize the installation.
Start the Installer:
sudo ./hst-install.sh
The script will begin by checking your server environment, verifying prerequisites, and confirming your operating system.
                _   _           _   _        ____ ____
               | | | | ___  ___| |_(_) __ _ / ___|  _ \
               | |_| |/ _ \/ __| __| |/ _` | |   | |_) |
               |  _  |  __/\__ \ |_| | (_| | |___|  __/
               |_| |_|\___||___/\__|_|\__,_|\____|_|

                          Hestia Control Panel
                                  1.9.2
                            www.hestiacp.com

========================================================================

Thank you for downloading Hestia Control Panel! In a few moments,
we will begin installing the following components on your server:

   - NGINX Web / Proxy Server
   - Apache Web Server (as backend)
   - PHP-FPM Application Server
   - Bind DNS Server
   - Exim Mail Server
   - Dovecot POP3/IMAP Server
   - MariaDB Database Server
   - Vsftpd FTP Server
   - Firewall (iptables) + Fail2Ban Access Monitor

========================================================================

Would you like to continue with the installation? [y/N]: y
It will ask to set Admin Password and Email:
You’ll be prompted for an admin password and an admin email address. Keep these details secure—you’ll need them to log in to the HestiaCP dashboard.
Please use a valid username (ex. user).
Please enter administrator username:
Please enter administrator password:

Please use a valid emailadress (ex. info@domain.tld).
Please enter admin email address:
Please enter FQDN hostname [hestia.example.com]:
Confirm Installation:
- The script will display a summary of your chosen settings. Typing y (yes) confirms you want to proceed.
- The installation will now run. This process can take several minutes depending on your server’s speed and network connection.
Step 5: Wait for Completion and Note Down Credentials
After the script finishes, it will display important information:
HestiaCP Admin URL: Typically https://<YourServerIP>:8083 or https://server.yourdomain.com:8083.
Congratulations!

You have successfully installed Hestia Control Panel on your server.

Ready to get started? Log in using the following credentials:

    Admin URL:  https://hestia.example.com:8083
    Backup URL: https://192.168.0.2:8083
    Username:   admin
    Password:   The password you chose during installation.

Thank you for choosing Hestia Control Panel to power your full stack web server,
we hope that you enjoy using it as much as we do!
Step 7: Access HestiaCP Through a Web Browser
Launch Your Browser: On your local machine, open Chrome, Firefox, or any preferred web browser.
Navigate to the Admin Panel: Go to:
https://hestia.example.com:8083
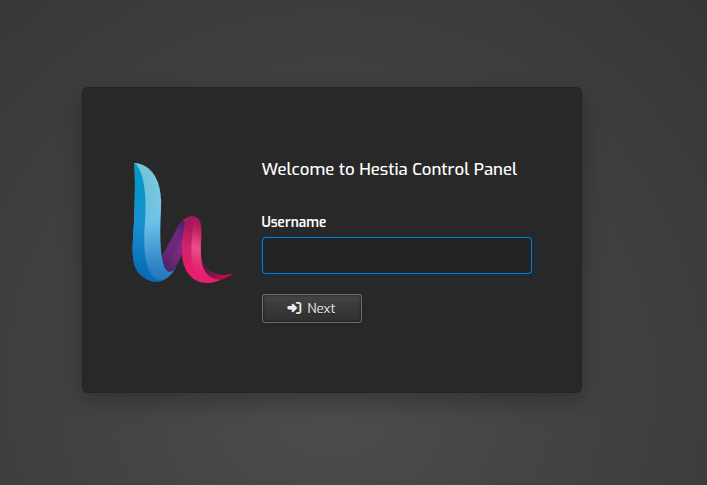
Log in: Use the admin username and the password you noted earlier.
Once logged in, you’ll see the HestiaCP dashboard. This is where you’ll manage domains, create email accounts, set up DNS records, and more.
Step 8: Basic Post-Installation Setup
To get started with HestiaCP, consider doing the following:
Add a New Domain:
- Go to the Web section.
- Click Add Web Domain and enter your domain name.
- The panel will create the necessary web directory under /home/admin/web/yourdomain.com/.
Setup DNS (If Managing DNS Locally):
- Go to the DNS section.
- Click Add DNS Domain and specify your domain.
- Make sure your domain registrar points your domain’s nameservers to your server if you want to use it as the authoritative DNS.
Create Email Accounts (If You Chose a Mail Server):
- Go to the Mail section.
- Click Add Account and follow the prompts.
- HestiaCP automatically configures Exim + Dovecot for you.
Install SSL Certificate (Optional):
- HestiaCP can generate Let’s Encrypt certificates if your domain’s DNS points to the server.
- Go to the Web section, click Edit next to your domain, and enable the SSL + Let’s Encrypt options.
Step 9: Keeping HestiaCP Updated
HestiaCP provides its own set of updates, separate from your system updates. To make sure everything remains secure and stable:
System Updates: Continue using:
sudo apt update && sudo apt upgrade -y
HestiaCP Updates: HestiaCP will show any available updates in its dashboard, or you can run:
sudo hestia v-update-sys-hestia-all
This ensures you’re always running the latest version of HestiaCP.
Conclusion
In this tutorial, we've learnt how to install HestiaCP on Ubuntu 24.04. From here, you can configure and manage your domains, emails, databases, and more through a convenient web interface. By following the steps outlined above, you’ve laid the groundwork for an efficient hosting environment powered by an open-source control panel.
Key Takeaways:
- HestiaCP is a free, open-source alternative to cPanel that is user-friendly and lightweight.
- A clean Ubuntu system with a properly set hostname is crucial for a smooth installation.
- Pay attention to firewall settings to ensure all necessary ports are open.
- Log in to HestiaCP via https://server.yourdomain.com:8083 (or your server IP) and configure domains, DNS, mail, and security as needed.
You’re all set! Enjoy your new HestiaCP-powered server, and feel free to explore the rich array of features and add-ons HestiaCP has to offer. If you run into any issues, consult the HestiaCP documentation or community forums for guidance.
